Refined Page Layouts
This is the time to embrace the failures. They are, afterall, the catalyst to my potential.
Tuesday, April 30, 2013
Saturday, April 27, 2013
Thursday, April 11, 2013
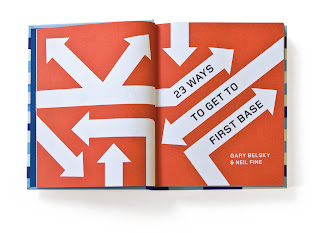
Designing a Book Introdcution
We were given a list of designers to check out, but I immediately just typed into Google search: Charles Rennie Mackintosh
I fell in love with his work when I went to visit the Glasgow School of Art. To this day, I wear a necklace with one of his rose designs as a reminder of that trip and that infinity I felt with his work.
I was pleased to discover that he was on the list already, so...
DIBS!
Here are a few examples of his work
 |
| Furniture Design |
 |
| He developed a Font |
 |
| Stained Glass Windows |
 |
| And of course, his Glasgow Rose |
Tuesday, April 9, 2013
Making the Cuts
I left the shop on Saturday wondering whether or not I could make the cuts for my center sections that would contain the guitar pics. This requires using the scroll saw and after practicing on it a few times, I wasn't entirely confident that I could handle it.
Honestly, that machine scares me.
Half the time I used it, it would freak out - or I would freak out - or both. It would kick up my piece of wood or start steering off in a direction I didn't want or become loose and shake violently or even break completely. I wasn't having the best luck with this machine, so I spent the most of my Monday morning practicing making drill holes and using the scroll saw.

My first indication that the use of this machine would be difficult was when I used it for the first time on my saw cut cardboard prototype.
As you can see, I am not very good at this.
After speaking with Cotter about it, I discovered two things:
First of all, the scroll saw doesn't work well with cutting cardboard. It turns out, it's easier when cutting wood because that is exactly what the machine was designed to do.
Secondly, you have to tension the saw. I did not do this, nor did the assistent tell me to do so. I realized that it runs a lot smoother when everything is tightened properly.
Next, I figured I should start practicing on wood.
I discovered that if I made three drill holes that had a radius approximately the same as the curve for my cuts, that I could avoid having to make the curved cut on the scroll saw. By connecting the three drill holes, I could focus on just making cuts to connect them.

 I felt like I was getting better and possibly ready to start cutting on my final pieces for my box.
The first few holes went pretty well. There was no splitting of wood on the back and I managed to not drill too close to the edge.
My second piece didn't go so well. I must not have laminated one of the pieces together well enough, because when I put the drill press through, it split off the corner! The guys at the shop assured me that I would be able to glue this back together. As this piece was drying, I decided to make the cuts on the scroll saw for my other center section.


Honestly, that machine scares me.
Half the time I used it, it would freak out - or I would freak out - or both. It would kick up my piece of wood or start steering off in a direction I didn't want or become loose and shake violently or even break completely. I wasn't having the best luck with this machine, so I spent the most of my Monday morning practicing making drill holes and using the scroll saw.

My first indication that the use of this machine would be difficult was when I used it for the first time on my saw cut cardboard prototype.
As you can see, I am not very good at this.
After speaking with Cotter about it, I discovered two things:
First of all, the scroll saw doesn't work well with cutting cardboard. It turns out, it's easier when cutting wood because that is exactly what the machine was designed to do.
Secondly, you have to tension the saw. I did not do this, nor did the assistent tell me to do so. I realized that it runs a lot smoother when everything is tightened properly.
Next, I figured I should start practicing on wood.
I discovered that if I made three drill holes that had a radius approximately the same as the curve for my cuts, that I could avoid having to make the curved cut on the scroll saw. By connecting the three drill holes, I could focus on just making cuts to connect them.
So I practiced.
Drilling holes.
Making cuts.

Making more cuts.
And making more cuts.

The first few holes went pretty well. There was no splitting of wood on the back and I managed to not drill too close to the edge.
My second piece didn't go so well. I must not have laminated one of the pieces together well enough, because when I put the drill press through, it split off the corner! The guys at the shop assured me that I would be able to glue this back together. As this piece was drying, I decided to make the cuts on the scroll saw for my other center section.
It went pretty well (in my option). I figured that I could file down the rest of the material that I wasn't able to cut, but it turns out that I was a little to aggressive with the file. It also turns out that filing this much material is extremely difficult. So, I took a deep breath and returned to the scroll saw to make a few more cuts to clean it up.

My next cut I needed to make was the push through hole. I used the drill press to create the hole, and this step went pretty smoothly for me.

I left the shop on Monday feeling good about my vessel. I sanded for a few hours and then went to Hallmark Symposium.
Monday, April 8, 2013
Saturday at the Commons Shop
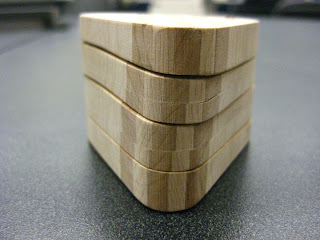
My overall plan for Saturday was to make the cuts to divide the four sections to my box.
I began my morning by drilling the hole that would have the rotating rod. This was my first cut before dividing my box into sections because I wanted to make sure the hole was consistent throughout the entire vessel.
I wanted to send the drill through the entire block of wood, but stop a little short. This would be where I glue in my rod.
I had measured my wooden block into guided sections, the middle two sections being 1/2" in width and the top and bottom slightly narrower than that.
I then started making cuts on the bandsaw.
I used the fence for the first cut and quickly decided that I was never going to do that again. The assistants in the shop said that usually, if you go slowly, you can be a little more accurate on the bandsaw if you free hand
So I did that. And....eh. Not the best, but it could have been worse
My next step would be to cut the two middle sections in half. I was really nervous about it. The amount of material I had left didn't leave a lot of room for error - in both wood AND my fingers. There isn't much material to hold on to.
I started off pretty good. Looks relatively evenly spaced, right?
Then I got closer to the end and my hands. That's when my cuts got a little wonky.
OMG OMG OMG
Making intricate cuts on the bandsaw with very little material is STRESSFUL!
My heart was pounding. My hands were sweating. I really didn't want to make these cuts. In hindsight, I probably should have used a jig to ease my mind and help with making straighter cuts. I also could have gone a little slower.
I ended my day having all my sections cut. The next time I went to the shop, my plan was to practice on the scroll saw and then make the inside cuts that would hold my pics.
I began my morning by drilling the hole that would have the rotating rod. This was my first cut before dividing my box into sections because I wanted to make sure the hole was consistent throughout the entire vessel.
I wanted to send the drill through the entire block of wood, but stop a little short. This would be where I glue in my rod.
 |
| As you can see, the hole passes through the top |
 |
| But not the bottom |
I had measured my wooden block into guided sections, the middle two sections being 1/2" in width and the top and bottom slightly narrower than that.
I then started making cuts on the bandsaw.
I used the fence for the first cut and quickly decided that I was never going to do that again. The assistants in the shop said that usually, if you go slowly, you can be a little more accurate on the bandsaw if you free hand
So I did that. And....eh. Not the best, but it could have been worse
My next step would be to cut the two middle sections in half. I was really nervous about it. The amount of material I had left didn't leave a lot of room for error - in both wood AND my fingers. There isn't much material to hold on to.
I started off pretty good. Looks relatively evenly spaced, right?
Then I got closer to the end and my hands. That's when my cuts got a little wonky.
OMG OMG OMG
Making intricate cuts on the bandsaw with very little material is STRESSFUL!
My heart was pounding. My hands were sweating. I really didn't want to make these cuts. In hindsight, I probably should have used a jig to ease my mind and help with making straighter cuts. I also could have gone a little slower.
I ended my day having all my sections cut. The next time I went to the shop, my plan was to practice on the scroll saw and then make the inside cuts that would hold my pics.
Subscribe to:
Comments (Atom)


